How to Install the 9700 Alternating Pressure Recliner Overlay
Installation Instructions for Home Recliners & Lift Chairs for the Following Models
9700-GRLB
9700-GRLB-4401
9700-GRLC
9700-GRLC-4401
9700-GR
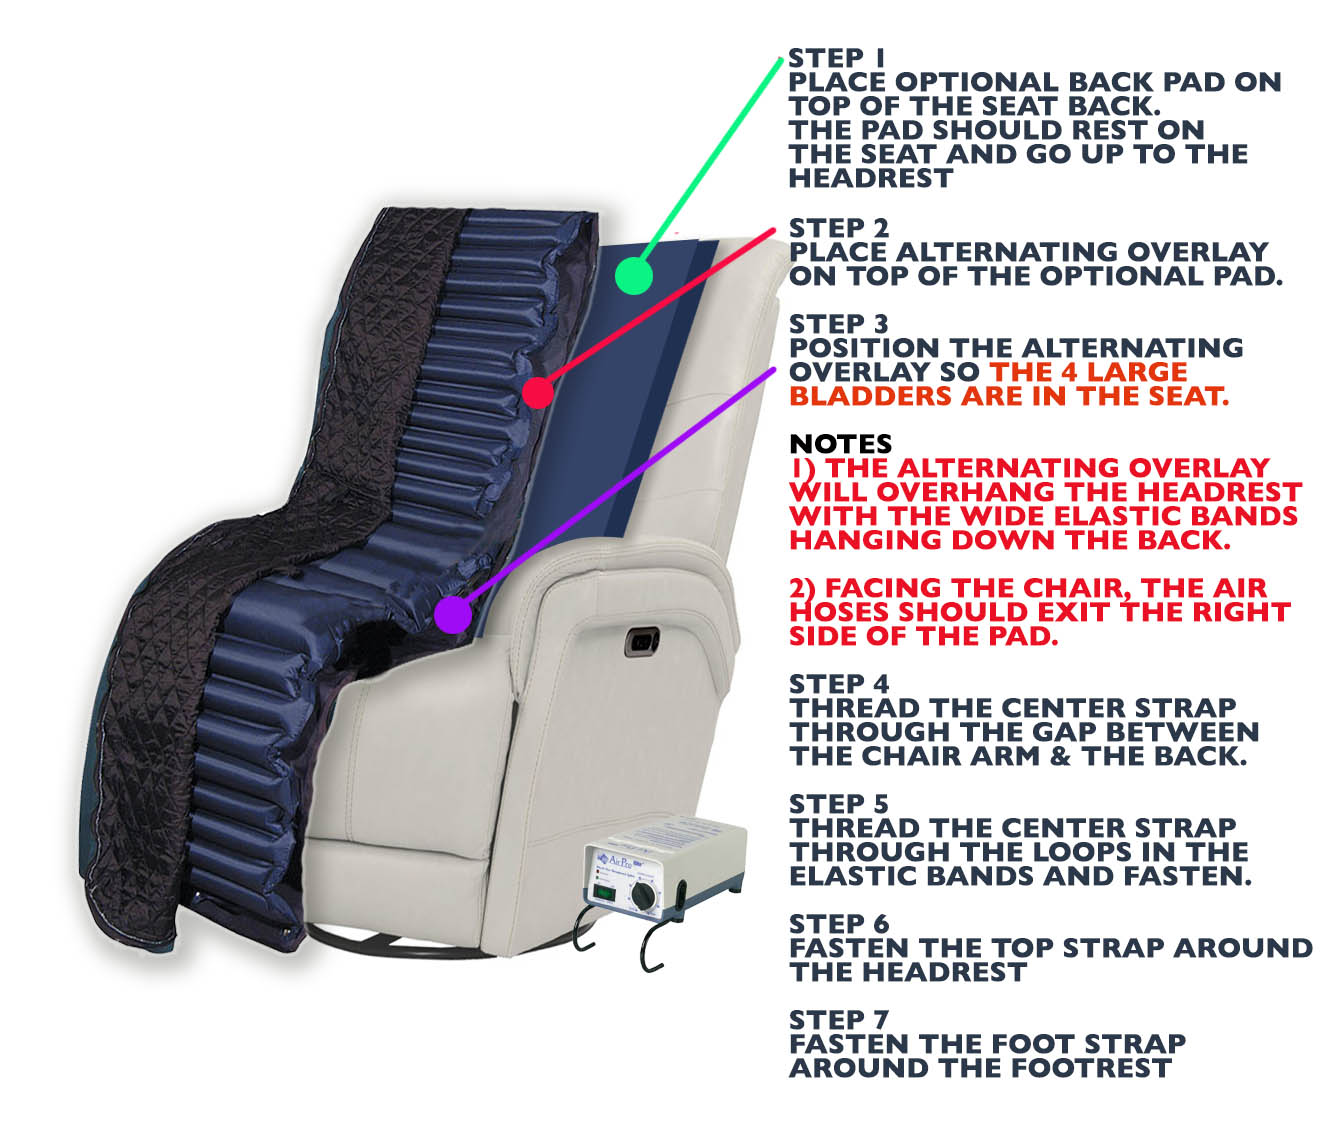
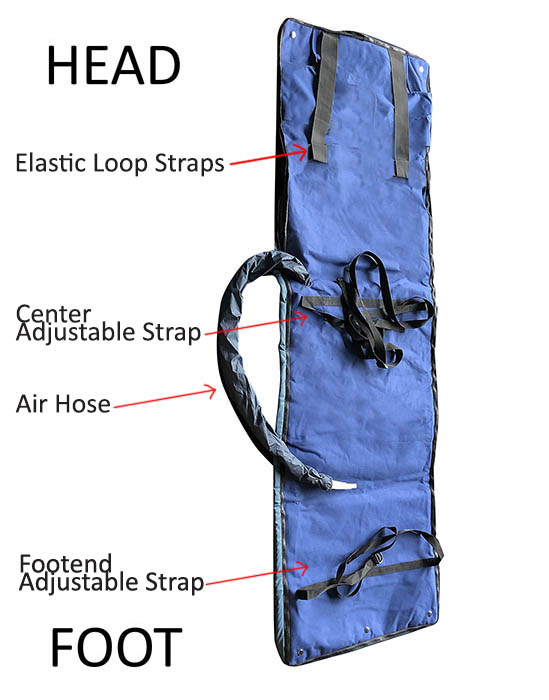
STEP 1 - Unpack
Unpack and identify the head and foot of the overlay. The Head of the overlay
STEP 2 - Place Overlay on Recliner
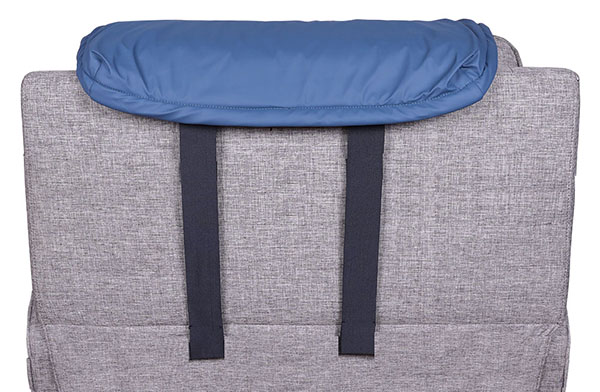
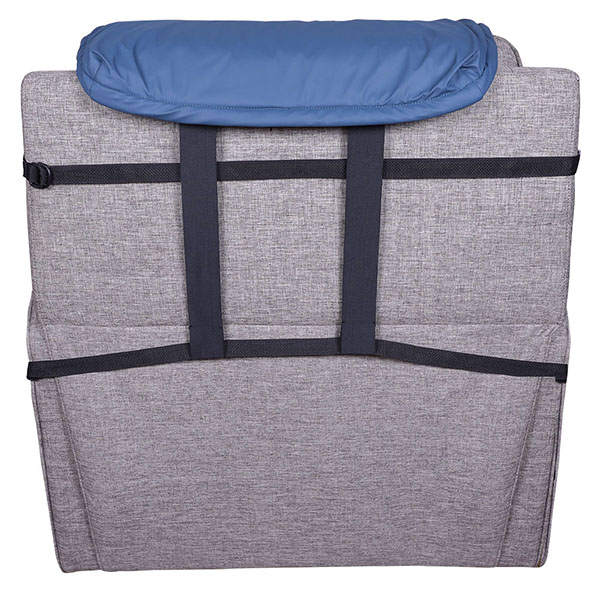
IF USING THE OPTIONAL BACK PAD SEE ILLUSTRATION BELOW
- The smooth Vyvex-III material facing up.
- Lay the overlay on the recliner with the head to the top of the recliner
- Make sure the Elastic Loops hang over the back of the chair (9700GRLB and 9700GRLB-4401)
NOTE: The top of the overlay should go OVER THE TOP head rest.
The black elastic bands at the top should hang down. (the center strap will feed through the loops)
POSITIONING NOTE: THE LARGE SEAT BLADDERS MUST BE ON THE RECLINER SEAT.
IF THE LARGE BLADDER IS UP THE BACK OF THE RELCINER CHAIR, REPOSITION THE CUSHION.
THE TOP OF THE CUSHION CAN FOLD OVER THE TOP OF THE RECLINER BACK.
(MAKE SURE THE LARGE BLADDER IS AT THE CREASE BETWEEN THE SEAT AND THE BACK)
Secure the center strap.
Ensure that the center strap is tight. This is your most important strap
From the back of the recliner, pull the straps around the back of the chair.
Feed the strap through the loops of the elastic bands from the top of the chair.
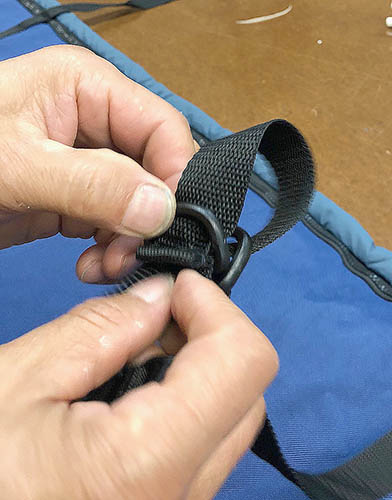
On one strap there are 2 D-Rings
To tighten the straps,
Pull the blank strap through the center of the two D-Rings.
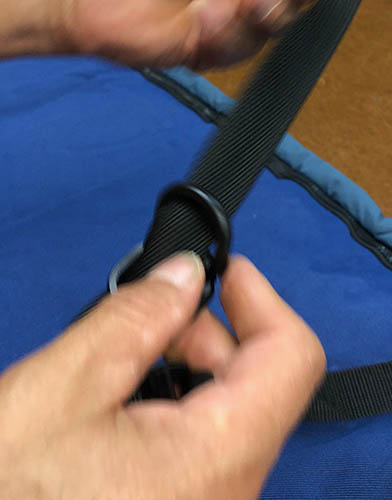
Next: Loop the strap over one D-Ring and Through the center of the other
NOTE see below for 9700-GR
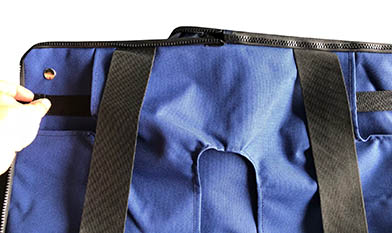
Pass the strap through the openings in the pocket at the top of the overlay. (The strap may already be installed)
STEP 4 - Secure the Head 9700-GR For Geri-Chair Recliners Only (skip for 9700 GRLB & 9700GRLB-4401)
Depending on your recliner, use the elastic straps or slip the top of the recliner inside the pocket at the top of the pad.
PLEASE CALL 888-450-0045 IF YOU ARE PLACING THE PAD ON A HOME RECLINER.
STEP 5 - Secure the foot end strap
Secure the foot end strap using the instructions above for the D-Rings
STEP 6 - Connect Hoses to the pump
- Decide where you would like to place the pump.
- Feed the hose over the arm of the recliner or through the space between the arm and the back
NOTE: Ensure that the hoses can not get kinked or pinched by the recliner.
- Slip the hoses over the input ports on the pump.
NOTE: It does not matter which hose goes on which port.
OPTIONAL BACK PAD INSTALLATION